


Webflow is a powerful tool for creating responsive websites. It allows designers to build beautiful websites without having to write code. In addition to being a great design tool, webflow also offers a suite of features to help developers speed up their workflow.
Whether you want to create a new website or redesign an existing one, these 5 webflow tools will help you level up your website.
These tools will add extended functionalities and bypass some of the limitations of webflow.
Let's dive right in.
1. Finsweet:

Finsweet is a team of talented designers and developers that create highly professional and beautiful webflow websites.
Finsweet offers numerous webflow tools that could boost your website, but there are two you should pay special attention to.
Client-first by Finsweet
The Finsweet Client-First styling system is a set of guidelines and strategies that help you develop Webflow websites in a clear, scalable way that users can easily understand.
You want your clients, marketers, and developers who open your Webflow projects to be able to recognize a class name and know what that class does.
Client-first is designed to be flexible and customizable for any build. There is no set of strict rules for Client-first. Every build is different.
Client-first is a thought process that helps us organise a Webflow project by thinking about how and why classes are named.
This system is built for Webflow Designer organisation and use; therefore, it does not follow the best practices of traditional HTML and CSS build conventions. This is a system made to easily clients to your webflow website.
As the name suggests, the 'Client-first' naming convention organises elements based on prefixes and keywords. The system aids you in creating meaningful names for the elements as you proceed through the build.
A client-first build comes with classes and styles that help you start any Webflow project. You can use these classes to establish a strong page structure or create a style add-on.
This set of classes will work for all web pages, sections, or elements. It's a global set of classes that manages one or more core styles that many pages, sections, or elements need.
Client-First also encourages creating custom classes.
It is encouraged to use custom classes for inner page elements. Creating a custom class with human-readable words can help someone who is inexperienced with Webflow better understand your Webflow build. It is also easier to update your build when using custom classes.
Finsweet Client-first is built to be a flexible system that encourages custom class creation to create and update every client's website easily.
Global Flexbox is not a system for the faint of heart. It requires many classes, add-ons, globals, and the potential use of unnecessary combo classes. Class stacking is needed, and the stacked classes may not make sense. This increases your build's learning curve, and most clients are not willing to learn or understand a CSS layout system. That's why client-first is not using it.
Clients often think their favourite layout system is simple. However, it is confusing to most Webflow users. It is confusing to most Webflow users. Each layout system is unique and unless someone already knows the layout system, there is a learning curve. Clients want to learn how to use their site, not how CSS and class stacking works.
If you have a custom class for your layout, the learning curve for site updates is lower and the likelihood of the client making a big mistake is lower.
Attributes:
With the Finsweet Attribute tool, you can add 'power-ups' to the Webflow CMS as well as other cool features. Here is the full list of features you can build.
With this tool, you can use the custom attributes tab in the Webflow editor to add a huge amount of flexibility and functionality to your site.
By adding a few lines of code to your site, you can create live CMS filters, create dynamic sliders from CMS lists, set custom favicons across pages, and create custom-rich text using inline HTML.
The "Attributes" system is completely modular, so you can choose which functions or attributes you want to use rather than loading a large library of unnecessary code.
2. Relume Library
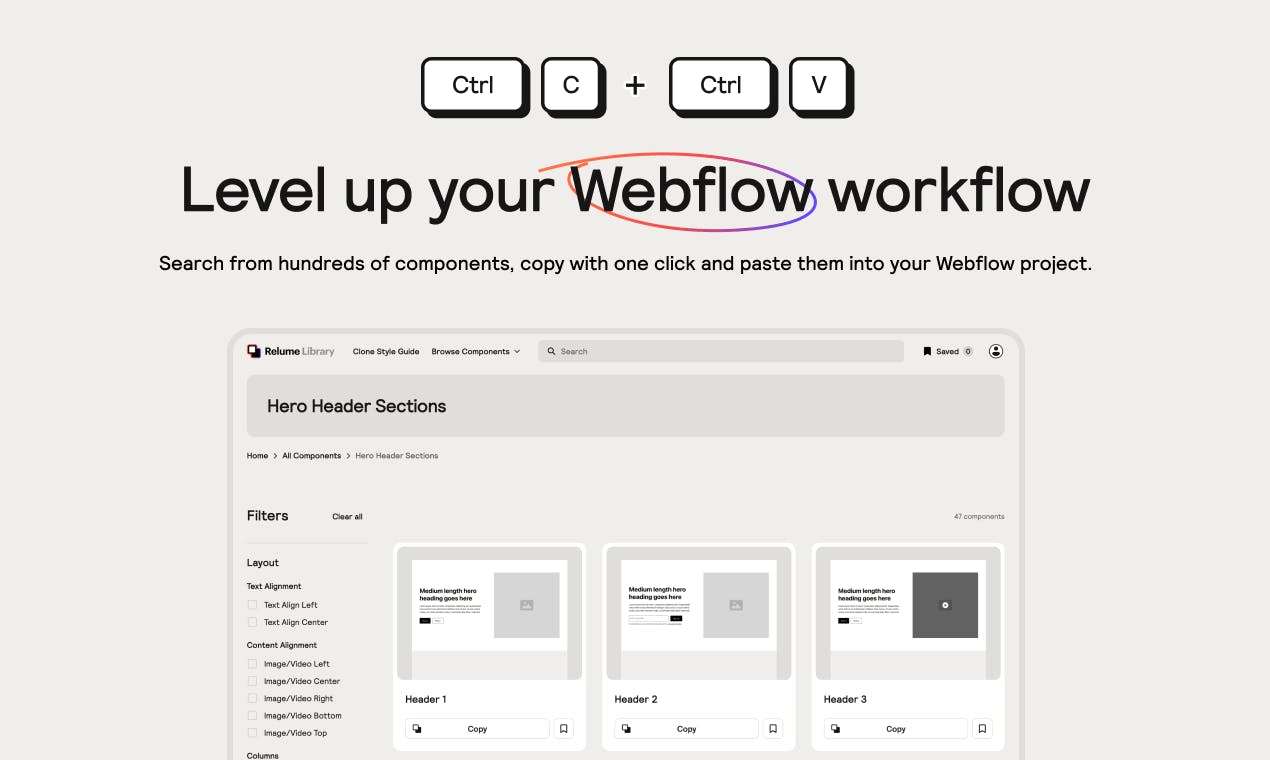
Relume Library is a webflow tool that contains a library with over 700 components, that you can simply copy/paste into Webflow
If you're looking to speed up your development time then this is the tool you should have your eyes on! And with more and more components being released on a regular basis, the complexity of sites you can build will also increase.
The best part of this tool, is that it is uses the client-first framework by Finsweet, which means it will perfectly integrate into your client-first Webflow site, without effecting other elements on your site, ensuring that your site stays smooth, and error-free.
A great way to start learning how to use this tool, is by watching Relume's introduction video to the Relume Library:
3. Jetboost.io

Jetboost.io is a webflow tool that allows you to add Real-time search, dynamic filtering, and more custom functions to your webflow website — without writing code.
Jetboost helps you to enhance your webflow website while saving you the stress of adding custom codes to your webflow website and debugging your code for hours/days.
Jetboost makes it possible for your website visitors to search items directly on your page in real-time as they type with instant, on-page search. It even works with paginated lists.
Using Jetboost's Dynamic Filters Booster, you can easily filter your site contents like tags, categories, and other groupings in minutes without writing complex codes on your webflow websites.
With Jetboost's visual editor, you can easily add powerful features to your site. Upon setting it up, it will instantly verify that it is configured correctly.
Jetboost Favourite CMS items booster also provides your website visitors the ability to favourite or bookmark items without the complicated process filled with broken zaps, frustrating errors, and wasted hours. You can even connect it to MemberStack, MemberSpace, and Outseta automatically.
To get started, create a Jetboost account and authorise it to access your webflow account.
The process starts with cloning a Jetboost template in Webflow, so we first need to import the right Jetboost boosters.
To add the header code to your website, click 'import boosters' and follow the instructions.
You can use Jetboost on any webflow.io staging sites for free indefinitely. You should only purchase a Jetboost subscription when your site is ready to launch.
4. Zapier
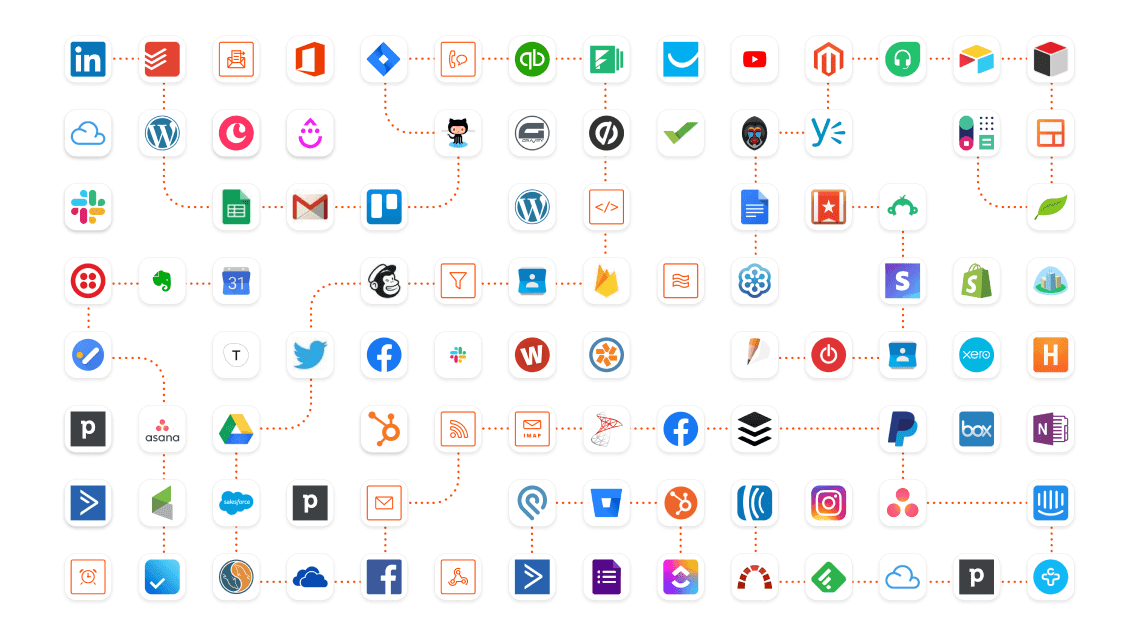
Zapier automates repetitive tasks by connecting two or more apps without any coding. Zapier can use events from one app to trigger an action in another app.
Zapier simplifies and automates various tasks like Sending a weekly reminder to your team to fill out a meeting agenda, Adding tasks from a project management app into your to-do list app, and Copying the emails of event attendees to a spreadsheet.
You can make over 1000 app connections using Zapier and also integrate custom APIs.
Zapier's connection is referred to as a "Zap." It is composed of two components: a Trigger, which is triggered by an event in one app, and an Action, which is carried out automatically in another app. For example, you would like to import CMS items from a spreadsheet. The Zap works as follows:
Trigger: Each time a new spreadsheet row is added.
Action: Zapier will create a new Webflow CMS item
If you don't already have a Zapier account, you will need to create one to integrate Zapier with your webflow website. After that, add your Webflow account to the connected accounts section.
Zapier needs permission to access your Webflow account.
Zapier connects with your Webflow account using oAuth (like Facebook and Google). When you integrate Webflow with Zapier and are already logged in to your Webflow account, Webflow will not require you to re-enter your password and present you with an authorization screen.
Zapier does not have access to any of the information in your account, including your password.
With Zapier, you can automatically route Webflow form submissions to hundreds of apps, including Gmail, MailChimp, Salesforce, Google Drive, and more.
You no longer have to manually copy-paste submissions from your dashboard into different services.
Here's a basic form submission process between Webflow and Zapier
- Log in to your Zapier account
- Click on Make a Zap
- Use Webflow as your trigger app
- Select Form Submission as the Webflow trigger
- Select your Webflow account
- You can set up Webflow Form Submission by selecting the site you want to receive notifications from and the form's name.
- To test the Webflow connection, click Fetch & Continue. You should have at least one form submission on your website or create a new form submission before testing the connection. Try troubleshooting your Zapier connection with Webflow if there's a problem.
- Pick an action app and follow the Zapier setup instructions to configure your Zap Action.
- Give your Zap a name and turn it on once it has been created.
5. Memberstack
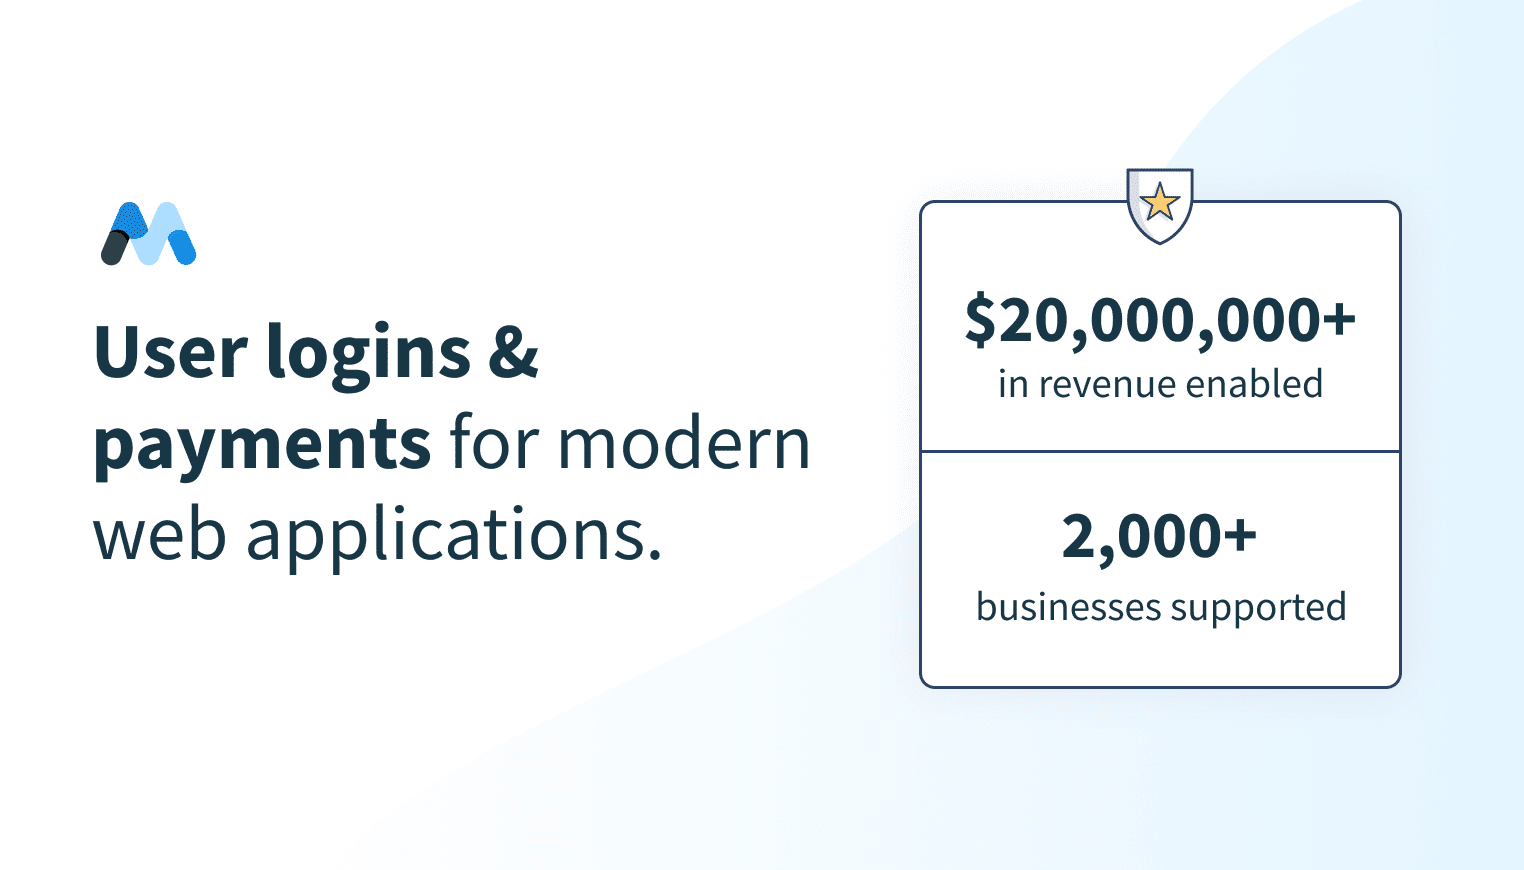
MemberStack is a no-code membership tool that allows businesses to receive payments create custom member areas, dashboards, and more.
Membertack is an intuitive and fantastic solution for creating unique user experiences.
Here's how to get your memberstack setup for your website:
After creating your website, the next step is to create a membership on the Memberstack dashboard.
From the dashboard, go to Create Membership -> Choose free or paid.
The next thing you do is to enable content hiding — for the demo, that is the page with the URL slug 'members' (see this video for more info).
After you've completed the registration process, It'll take you to our member's page. Save the file.
Fill in First Name and Member ID as sign-up fields in Forms & Fields. Be sure to toggle on 'Hide from the profile' for the Member ID.
Select Power-ups, and then from the drop-down, choose Power-ups again. Scroll down to the Security section and find Member-specific pages. Toggle it on, and open the drop-down.
Under 'Hide a folder or CMS collection,' add the slug "members/".
Now navigate to Members. If you don't have a test member, add a member manually now.
Select that member and copy the Member ID from below the email address.
Paste Member ID into the 'Member ID field' under Profile Info, and to the URL of the Member page, and hit close.
Your member dashboard in Webflow is now linked in Member Stack.
To link the dashboard, the Member ID will need to be manually or automatically entered for each member in both Memberstack and Webflow in the Members Collection list.
Bonus Tool!
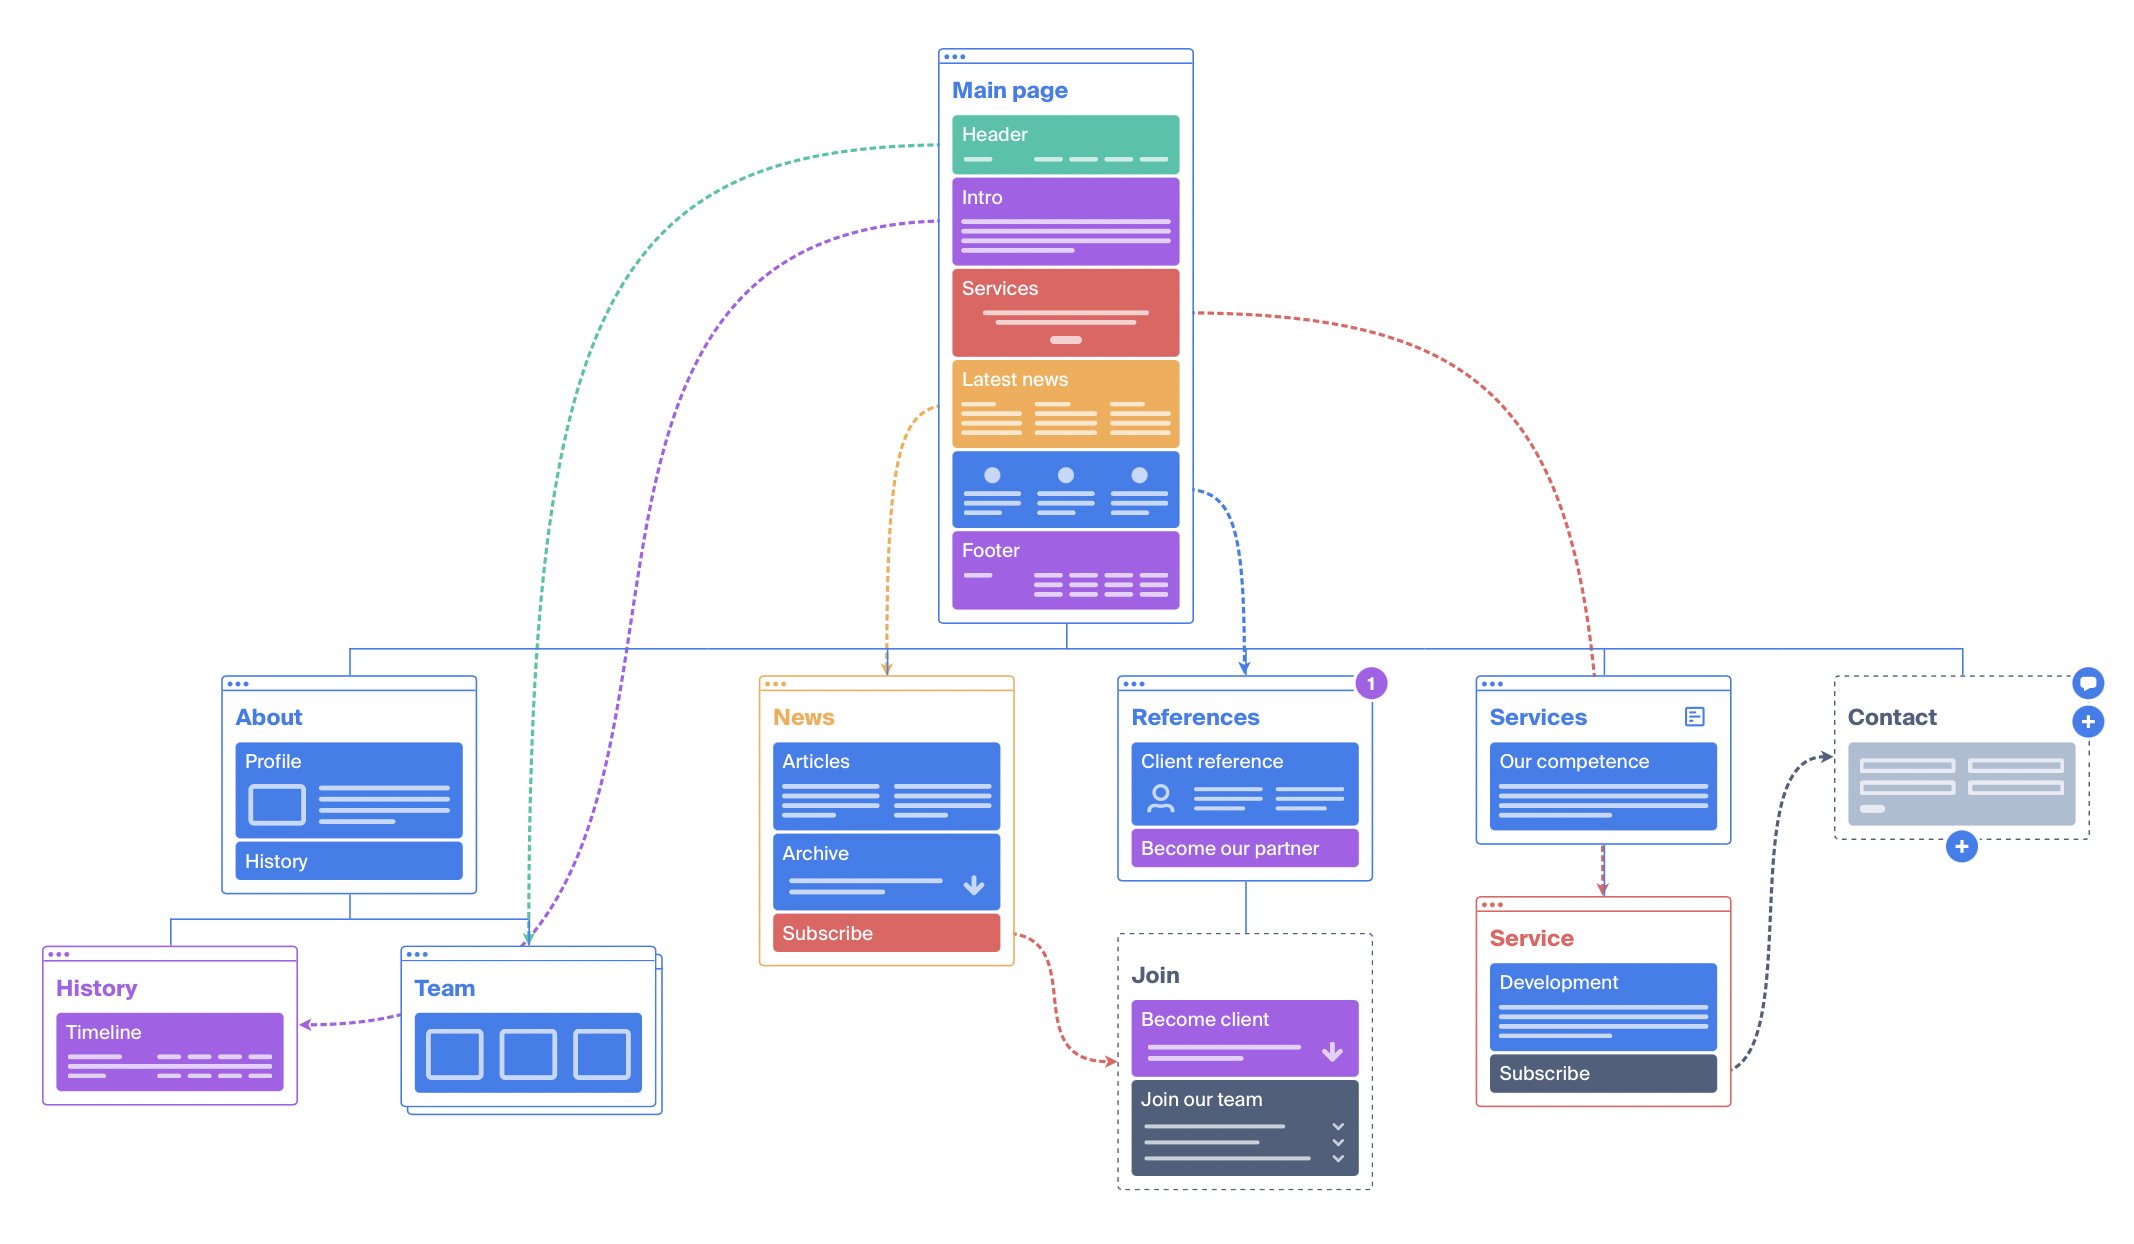
Octopus.do is a webflow tool that helps you visually draw out how a website will flow and it will give you an idea of the user experience.
Octopus.do lets you build websites in real-time using the Content Brick Method and share it with your team or clients. You can plan and create colourful visual sitemaps that are pleasant to look at and share with your team and clients.
Here's a list of things you can achieve using the Octopus.do tool.
Super Fast Prototyping tool helps you create a visual sitemap for your website.
Use a low-fidelity wireframe kit to represent the website structure visually.
Export sitemap to hi-quality vector PDF and PRINT
A visual sitemap generator for XML sitemaps is a great way to organise your sitemap for any website.
Octopus lets you work with containers such as web pages, application screens, dialogue boxes, and logical entities. You can create pages, edit, move them, change their type, add and delete content blocks without any limitations.
Every site page or app screen can include blocks to represent content. You can design a colour scheme for your projects where each block colour represents a content type like meta-title, meta-description, title, body; you name it.
Blocks provide a bird's eye view of your project. You can add, edit, move blocks, change colour, and delete them.
Octopus provides a complete project costing system. You can set up your project time and cost estimates page by page. You can define the production times and hourly rates for different specialists on your team. Octopus will use the data to calculate the total project cost.
The Estimation panel can be used to set the time intervals needed for each screen. The totals can be seen in the Estimates table, where you can set hourly rates, define project stages, and calculate related costs.
At Pristine Digital, We made our own Webflow version of Octopus.do called SiteFlow. It is cloneable and it allows users to build visual sitemaps inside of Webflow using only pre-built Webflow symbols and simple hide/show div blocks.
It's completely free! >> Clone it
Conclusion
We've covered 5 Webflow tools to level up your webflow website in this article.
Which of these tools have you used in the past? Kindly let us know in the comments.
If you'd like to know more about using these tools on your webflow website, feel free to reach out to us.
You can check our Webflow page, where we create many tools and cloneable projects to get you started.
Get in touch with us today, and we'll more than happily provide a free video site audit that explains the current state of your website as well as practical tips + resources to improve.
.webp)
.webp)
Let's talk about your next project.
From highly interactive websites, or micro-sites, to Figma > Webflow development projects, we’ve got you covered - our team of Webflow experts are here to help.


